Uncategorized

Beginning Sewing

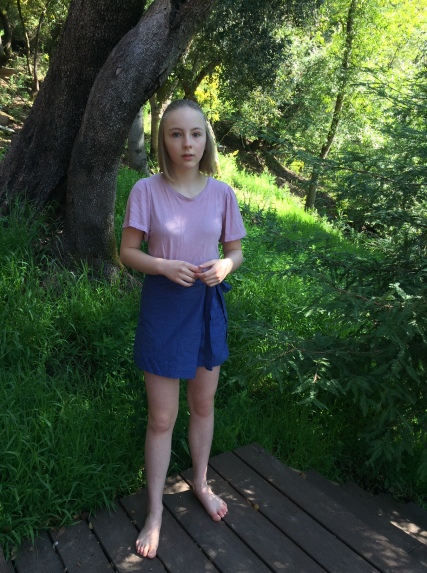
This weekend, I taught my coworker and friend’s daughter, Adeline, how to sew a simple wrap skirt. Here she is wearing it! She did a fantastic job, and it was a lot of fun teaching her.

IMG_1449

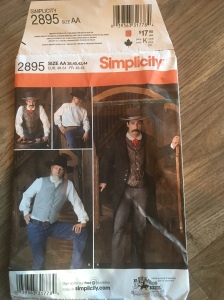
The pattern is Simplicity 8133.  The design and lines of the skirt was great, and instructions were given for measuring yourself, selecting fabric, etc.  However – it also included a few things that seemed unnecessary and difficult for a beginner:

  • The pattern instructions tells you to hand-baste the front skirt edges (the pieces that wrap over each other in the front.  We sewed them down with a machine straight stitch.
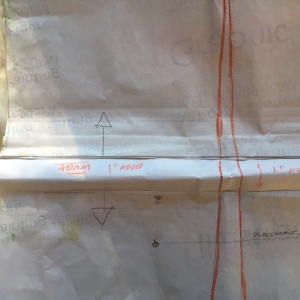
  • The pattern is also missing clear placement for the ties and, because of the way it’s constructed, it’s very easy to catch the wide edges of the ties when you’re sewing them into the waistband.  A wider waistband draft or clearer instructions would fix that.
  • Hemming with a machine hem stitch is a tricky skill, and it’s easy to catch the fold of the fabric when you’re starting out.  We folded them hem under and pressed, then topstitched it down.
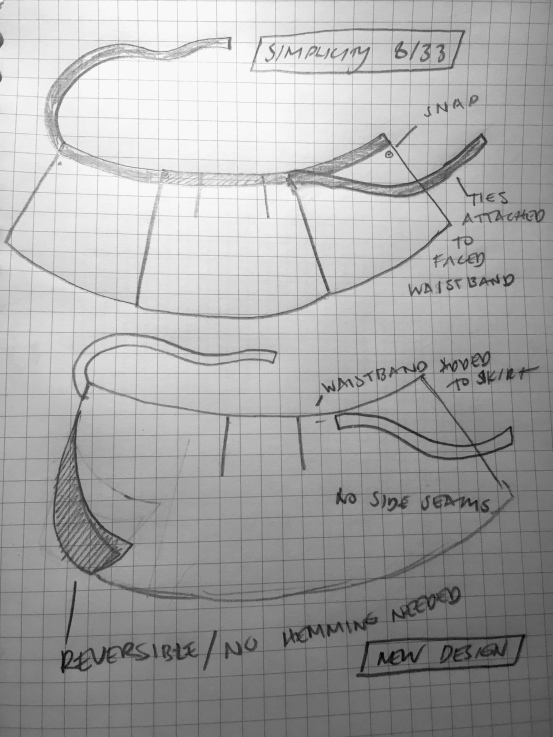
  • The side seams aren’t completely necessary – while they add shaping, you could open them to make the skirt more easily reversible.
  • Similarly with the waistband: to make this even more basic, you could opt out of the waistband altogether, and simply add that waistband height to the length of the skirt.A sketch of the design, and then an adapted design we might try next time to make it reversible:IMG_1458

    Some general takeaways for teaching someone to sew clothing:

  • Limit the speed of the machine presser foot if possible.
  • Explain the importance of proper ironing technique
  • Start with a project they’re interested in making within their skill ability. A wrap skirt, simple tank top (no sleeve setting), or bag/pouch seem like good starts.
  • Take accurate measurements beforehand.
  • Explain ease, or the amount of room allotted in a pattern. Wide leg pants have more inherent ease in their design, which basically just means the added room for movement in a pattern.
  • Finished garment measurements for bust and hips are something I didn’t learn about til a few years ago. For Big 4 patterns (McCalls/Vogue/Simplicty/etc) these are printed on the tissue of conventional patterns, instead of the outside envelope – on many indie patterns, they’re often much easier to find. Knowing these numbers makes it easier to determine whether you need to go down, or up a size.
Dresses · Music

Floral viscose dress

There’s always something thrilling about finishing a project at the absolute last minute, which may be part of why I waited till the eleventh hour to start working on most of my high school (and, let’s be honest) college essays.  This dress was definitely that kind of project. And it shows… there are definitely many imperfections, but overall I’m happy with it!

Sewing is something I generally do in shorter increments of time these days, so luckily I had already cut and prepped a lot of the pieces a couple of weeks prior.  However,  most of the work on this dress was completed the day before I was planning on wearing it, for a performance at a local arts and wine festival.  I sang as a guest on a few songs with a fantastic band performing there.   They are seriously great musicians, and it was humbling to be on stage with them, particularly the vocalist Kenny Washington, who is as kind and generous as he is prodigiously talented.

This dress is actually made from the same pattern I used for an earlier make – which was in turn based off a dress I bought at Crossroads Thrift Store.  The differences in this one – I used a woven instead of a stretch woven, French seamed everything, and slashed/spread the sleeves and lengthened them so they were more fluttery than before.  Slowly but surely, I’m refining this pattern into something I can make multiple ways.  However, the idiosyncrasies that happen when you’re not a professional drafter have inspired me to learn more about drafting myself; it’s annoying when pieces don’t match and edges don’t meet up.

TIPS: I found this tutorial from Lladybird to be very helpful in finishing cap sleeves.

The fabric is a rayon/ viscose from Stone Mountain Daughter Fabrics, and thankfully I bought enough of it to make a tank top as well.  I don’t see it on their online store, but they do have some beautiful rayons in stock right now!

Thanks to James Jordan for the performance photos!


Projects · Sewing for Others · Tops

In-vested.


I thought I would write a blog post about the process behind creating two bridespeople vests for my friend Sarah’s wedding.  A little background: I’ve known Sarah since elementary school.  We were each other’s Spanish language partners in junior high and documentary filmmaker partners in our twenties.  She has been a great friend all these years and I’m a big fan of her entire family, who are all wonderful people as well.

Sarah approached me a few months before her wedding and asked if I would be able to contribute by sewing these vests.  After some consideration, I agreed – I’m less intimidated making flat pattern adjustments and doing fittings since taking Suzy Furrer’s classes on Craftsy and Lisa Maynard’s class on Flat Pattern Adjustments.  The challenge would be creating not one, but TWO lined garments for two differently shaped people.

Rachel and Adam were the people in question: thankfully, it turned out that they have extremely similar measurements in the upper body, which made adjustments a lot easier.

I already had a decent vest pattern in my collection: Simplicity 2895, a sort of Wild West costume pattern set that I actually bought for Halloween 2016.  I used it to make a black frock coat for Elias’s costume and saved the pieces.

I cut a 38 (the smallest size), and traced it off onto paper. I then used a vest that Rachel had given me to compare sizing.  I kept the width of the pattern piece the same, but I raised the armhole considerably, shortened the length, and took in an inch and a half for her vest to make it sit better on her shoulders.  You can see below that I raised the armhole up about an inch.

I sewed Rachel’s vest first, and then I made Adam’s adjustments on the same piece. Adam has broader shoulders and a slightly longer torso, so I added back an inch to the shoulder width and length (after removing for Rachel’s).

I also changed the location of the upper welt pocket, which was in a weird spot, I thought, in the pattern marking.  I moved it up and closer to the edge of the vest. You can see this below.

Welt pockets! These were a study in patience. And fray check. And seam ripping.  It’s been years since I did them – I suppose I could have left them off, but they’re so elegant looking on menswear. And practical.

Fully lined with rayon bemberg.

I did the buttonholes and buttons with my mom’s awesome Janome New Home 3000.  The rest was done on my 20-plus year old champion of a machine, a Bernina 1000 Special.

The back of the vest has a waist tie for more fitting. Here’s a sideview.

These vests were a labor of love and a pretty intense project! I’m not exactly set up for production line sewing; it would have been more efficient to cut out both vests and sew them together, but I wanted to see how Rachel’s fit before I started on Adam’s. I’m glad I did it that way since I made some adjustments that were easier to carry over on the second one.   I’m hopefully that Adam and Rachel will wear these for years to come.

Congratulations, Sarah!


Projects

Halloween.

I thoroughly enjoy any excuse to start a new project. Halloween is no exception. One of my finest moments was waaaay back in 2007, when I made this, a gila monster costume.

unnamed

For the unitiated, the gila monster is not, in fact a monster, but an actual lizard – the only venomous lizard in the US, in fact! – and it resides in the Southwestern United States as well as the Sonora area of Mexico.   I had so much fun making this. I used a tutorial to from some long-defunct early website that had step-by-step instructions for measurements to craft a custom leotard. I used a baseball hat to form the head over with upholstery styrofoam,  and wooden beads for the eyes.  I bought black gloves and glued gold Lee Press-On nails for the “claws,” giving this costume a vaguely “Cats” like appearance.  Note: I did not sing musical theatre while wearing this, though I did dance enthusiastically. My favorite comment from the night was from a man on the street: “Is that a maaaan, or a woman in there? ” As the costume front hood covered up the chest area, and because I am narrow hipped, it was a slightly androgynous look.

Fast forward to 2011: when Elias and I were first dating, I showed him this costume, and we decided to make an axolotl costume that he could wear during the first Halloween we spent together as a couple. Mind you, these two animals would never encounter each other in the wild, but they both share all the hallmarks of Very Unusual Creatures.  Elias actually has a pet axolotl, Irwin, who glows in the dark under a black light due to being spliced with jellyfish DNA (a common practice in axolotls kept in labs: as they can regenerate their own limbs, they are often kept for experiments.

Here we are as the axolotl and the gila monster, in 2011. I used a soft polyester plush material for the head, again forming it over a baseball cap, and sewed the gills separately, stuffing with foam.

axolotlgila

Fast forward again to 2014:

I used Wintercroft Masks’ amazing Skull mask to create a Dia De Los Muertos skull mask for when our band played a friend’s house party.  Not sewing per se, but still fun.

diade

This year: we’re going as plague doctors.  What is a plague doctor, you ask? Well, it’s a real life, historical fact that doctors wore these insanely creepy masks to tend to victims of the bubonic plague in the Middle Ages.  Here’s an interesting article about this phenomenon from i09/gizmodo.com.

I’m making the masks out of vinyl and stitching with leather cording, but I still need to find a hat. As this article states, “no job in the 17th century really meant anything unless it had an official hat.” Disease HATES hats.

plague.png

Tops

Self-Drafted striped t-shirt

Screen Shot 2016-10-21 at 10.37.15 PM.png
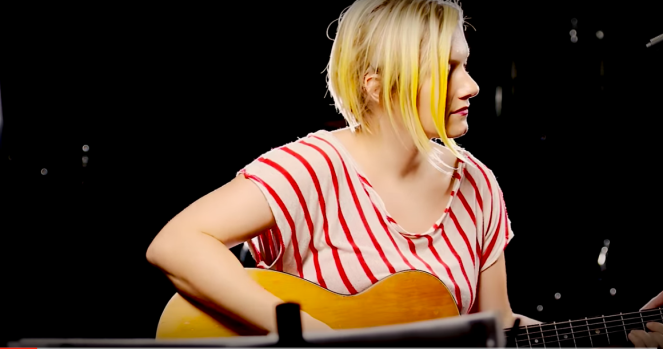
An old make, but one I have worn literally to death. This post is post-mortem, as the shirt’s stitching basically fell apart due to the fact that I don’t have a serger: sewing cheap knits on the bias without one is NOT recommended.  While I like the look of the stripes on the diagonal, I don’t love how gape-y the neckline is: I should have used stabilizer or clear elastic, but until I made my Sallie jumpsuits I’d had no experience using it.

It’s a simple pattern: two boxy rectangles with holes for sleeves, but the bias cut made it cling nicely in all the right places.  I’m excited to invest in a serger someday, but like all big purchasing decisions, I am agonizing over which one to get! Any suggestions are welcome. Leaning towards Janome because I know a dealer nearby, but have heard good things about Juki too.

Blogs · Music

Music and fashion.

singing
Photo taken by my good friend, James Jordan: http://www.jamesjordan.pictures

I have always loved to sing.  I just haven’t – and still don’t, completely – love singing in front of other people. To me, it has always seemed sort of an unwelcome aural assault when people are too free to start crooning at a moment’s notice.  And it’s often the case that the most confident are sometimes the most unskilled, as explained by The Dunning Kruger Effect.

I was shy growing up and never sought out musical theater, or chorus.  I would make fun of the girls my age who sang musical theater numbers at the local state fair, imitating their brassy tone and secretly wishing I was brave enough to get up there myself.  I was horribly self conscious in general as a kid, like many of us are, and never really sang except when I was sure no one else could hear me.   Some of my fondest memories growing up were riding my bike alone along a trail through the woods, singing loudly to myself.

I have played guitar since I was about 12, and was in a doom metal/sludge band in my early twenties, a fact I blame for the occasional ringing in my ears, but though I love a good sludgy distorted guitar riff, my love has always been for more traditional sorts of music, those songs with sung vocals, rather than screaming.  I was never quite in step with my peers in terms of modern music that was popular at the time, but I can find something to like within every genre of music.  I love it all, though jazz and blues are my favorites.

For the last 4 years I played in a garage band with a few friends, singing, playing bass and guitar and mandolin when needed: mostly covers, but some originals. I started writing songs when I was about 16 or so, but it has only been within the last 5 or 6 years that I have begun performing them. I’ve also worked up the courage to perform with friends who are far more accomplished musically than myself — the absolute best way to learn.

sarah_and_i
singing at a friend’s wedding in 2012, with my wonderful friend Sarah, an accomplished singer, in a dress I made for the event.

Because I am naturally reserved and not known for my electrifying stage presence — and I love to research, I have enjoyed looking at photos of some of my favorite female musicians since I started getting up on stage.  A sense of style helps define performers and gives them confidence, just like all good clothing should.  I loved reading that Patsy Cline’s mother made many of her outfits.

From left: Dinah Washington, Linda Ronstadt, Karen Carpenter, Patsy Cline.

Here is a video that my friend James and I made last summer, from an original song of mine.  It’s far from perfect.  But if sewing has taught me anything, it’s patience – and also, just MAKE it already, who cares! The journey is always more fun than the final product, and I’m proud of this song nonetheless. Just like a sewing pattern, I look forward to re-working it soon to make it better.

Projects · Tops

Seersucker Belcarra

belcarra1

This blog has lain long neglected, but I thought I would begin the series of 2016 posts by writing about something that I wear on a near-weekly basis: this seersucker Belcarra Blouse, by Sewaholic Patterns. I actually made this in August of 2015, right before the school year started. Even though I’m an adult, an instructor, and not technically in need of “new school clothes,” I still like making something to celebrate the start of the new semester.

I downloaded the pdf of this pattern, and, after reading about the sizing for Sewaholic patterns (small busted/narrow up top, wide hipped, aka pretty much the opposite of how I’m built) I decided to do a full bust adjustment and cut a size 12 based on measurements. However, when I tried it on it was huuugge, and the necklace was way too wide, and gaped in front – plus there was a whole bunch of ease in the back. Since reading more about others who’ve made this pattern it seems like the neckline issues are pretty common.  I nipped in the back center seam, and took in the neckline with three darts on the front.  I actually like the way these front darts look with the striped seersucker I used – which incidentally is THE best summer fabric for the hot, dry summers we have out here in the Central Valley of California.

belcarra2belcarra3
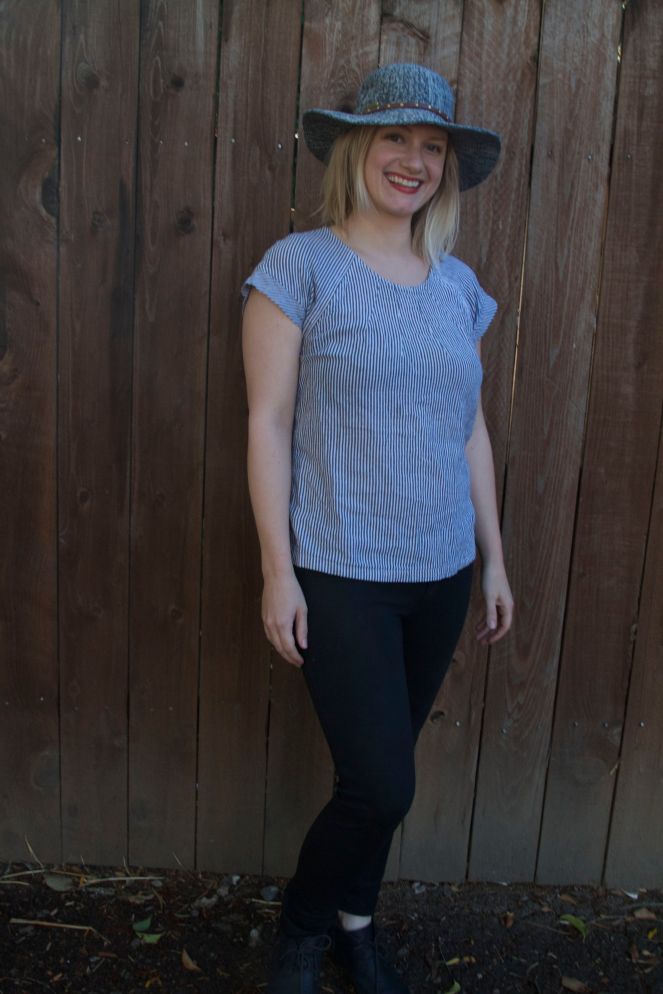
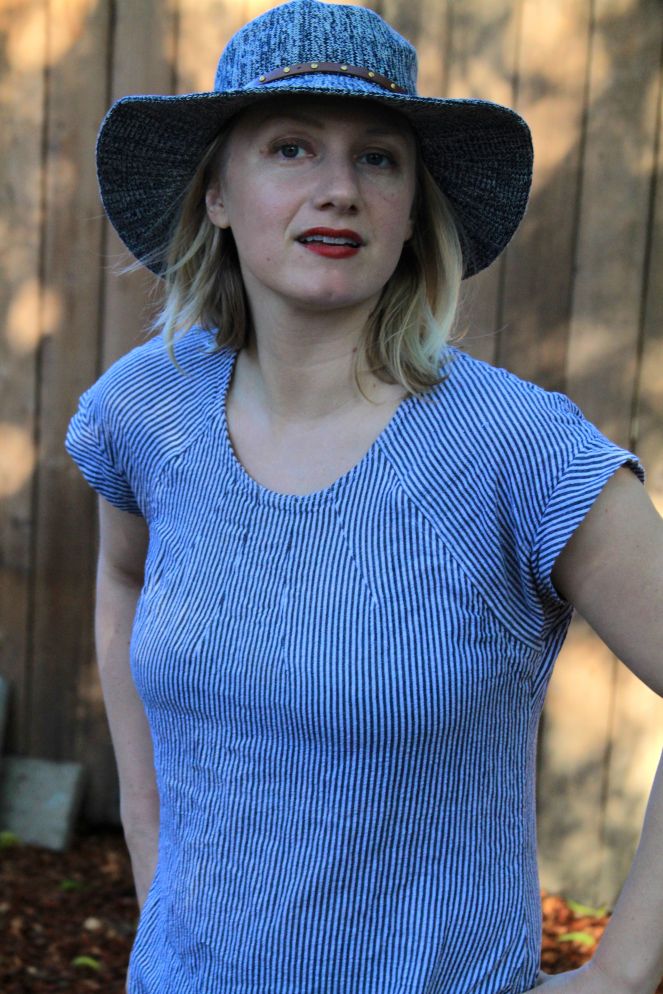
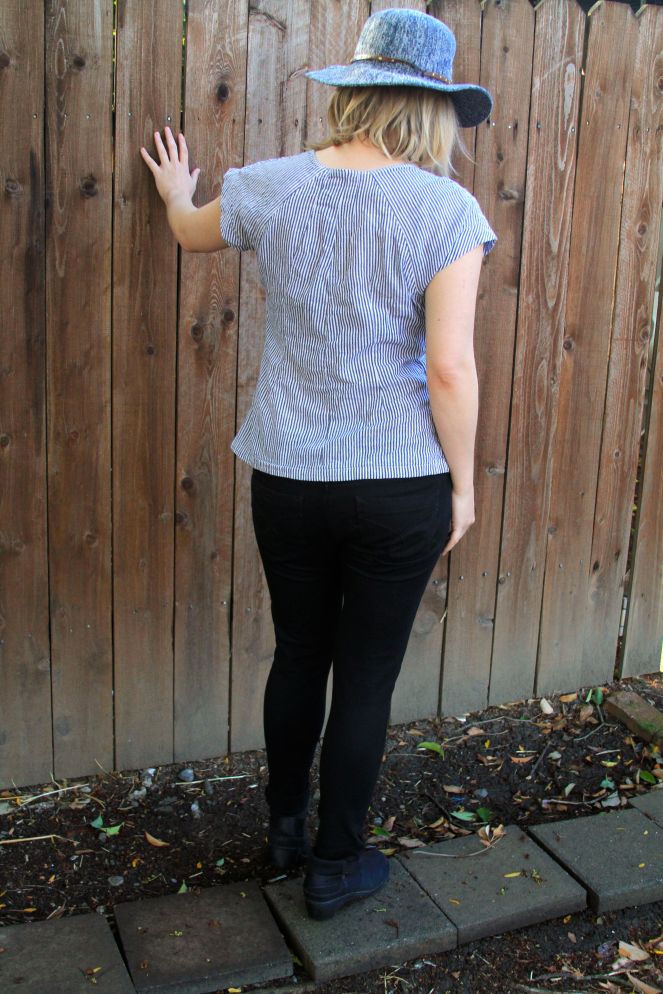
Since making this blouse, I have made two more Belcarras –  one in a polyester from Joann’s, and one from linen – and I sized down to an 8, without an FBA. Both fit fairly well, but the issue with the gaping neckline remains, and I still like this one the best.  I recently took a Craftsy class on making flat pattern adjustments, and learned enough to re-draft the Belcarra blouse into a more fitted style with flowy sleeves and used great rayon challis I picked up at Britex Fabrics.

All in all, I like this pattern a lot: especially the sleeve binding detail, which is a feature I’m noticing on a lot of blouses and shirts – even in knits – and the raglan sleeves.  I’m modeling it in the hay bale winter garden that Elias planted.  If you’ve never seen or tried this kind of planting, you can learn more about it here: a very cool way of container gardening.

Dresses · Projects · Uncategorized

Lady in Red

dress
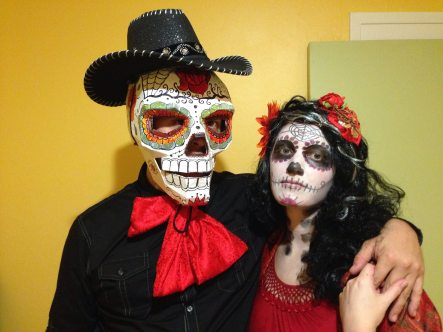
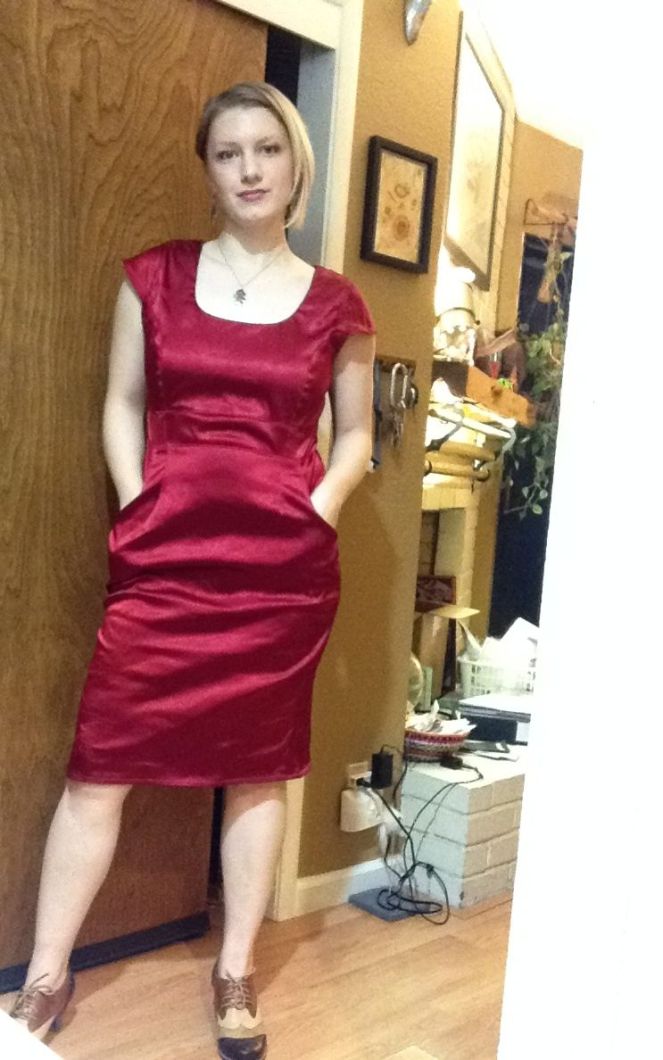
“…The lady in red is dancing with me, cheek to cheek,
There’s nobody here, it’s just you and me,
It’s where I want to be,
But I hardly know this beauty by my side,
I’ll never forget the way you look tonight…”

When I hear the song “Lady in Red,” I’m immediately transported to another time in place: a time of acne, Trapper Keepers™, and vague adolescent angst.

I am thirteen and at a junior high school dance.  It’s always the last dance of the night, and as the chorus of the song swells,  I watch my classmates dance under the watchful eye of the Vice Principal, their arms outstretched and stiff on each other’s shoulders like conjoined zombies.  Before the song ends, someone asks me to dance too, and now I am swaying with the music, my hands placed awkwardly on the shoulders of some teenage boy, staring to the right or left of his shoulder, making nervous conversation.

This dress was the result of a self-drafted pattern. My sister, who has always had an amazing eye for fashion and color, spotted this bolt of this fabric on a shopping trip last summer, and we each ended up getting about 5 yards each.  It’s odd stuff: polyester, rayon, with about a 50 percent two-way stretch.   Both of us immediately saw it and thought: WIGGLE DRESS.
I wasn’t sold on any of the patterns I found – and so I decided to base it off a dress that I love, a stretch gray plaid thrift store purchase with princess seams, cap sleeves, and a fitted, two-piece construction.

My process leading up to the making of this dress:

  • try on favorite dress in closet.
  • Realize that said dress is too small now
  • Squeeze into it anyway and proceed to break the zipper
  • Curse loudly
  • Make a mental note to go to the gym a lot more, starting after the holidays
  • Take off the dress and proceed to rip it up into pieces, which was oddly satisfying.
  • Draft a pattern from those pieces and add:
    • longer zipper
    • more ease
    • pockets!
    • cap sleeves cut on the bias – because the added stretch is necessary to give my arms room to raise above my head; the old dress was a little lacking in that department.
    • a longer skirt and a kick pleat

I gotta say, I’m really happy with it, and my additions to the original pattern make this a wiggle dress that I actually want to wiggle into.  And I mean – nothing says sex appeal like pockets, right?  Being able to shove your phone and keys somewhere, allowing your hands to gesticulate freely, is something I value highly. It’s comfortable without being constricting, red is my favorite color, and overall – I achieved my vision with this fabric.

What I would have done differently:
I originally applied tricot interfacing to a facing for the waistband, which radically changed (read: tightened) the fit and made it a little uncomfortable, so I was forced to unpick a bunch of hand-stitching and remove the interfaced facing from the inside, which was annoying and tedious.  If I make this pattern again, I’d like to try it in a fabric with less stretch and more body (the original fabric was about 25% 2-way stretch) – and I’m excited to see how it would look in a cool pattern or maybe a solid color rayon for the summer months. Honestly, as much as I love the color of this fabric, it pre-washed strangely – and it easily snags, leading me to believe that it’s not the best of quality.

What I learned:
I (re)learned several new things: how to draft a kick pleat and finish/bind a cap sleeve, install an invisible zipper, how to use my twin needle for finishing hems, AND try out my new Bernina walking foot. I LOVE the walking foot and I’ve since used it on a bunch of other stretch fabric projects.

red_dress
at the wedding of a friend this May.